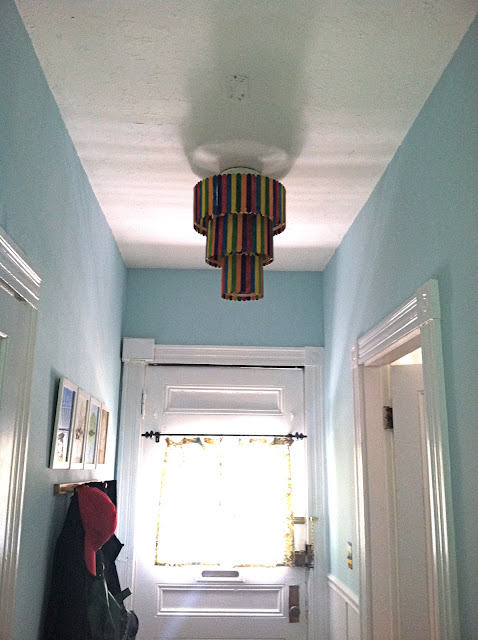
I've been bad on the blog front. I swear I've been working on projects, but I haven't been good about sharing them in a timely fashion. I kind of stymied myself for awhile with this particular project, which I like a lot but just can't get a good photo of. So I've been delaying posting about it. But the time has come, despite the cruddy pictures.
Since I tackled the hallway makeover, I've been wanting to change the light fixture from the ho hum affair currently in place.
Ho hum:
My plan was to create a chandelier/pendant light inspired by this one that I came across:
As mentioned previously, I have to rein myself in sometimes and remind myself that a boy lives here, I can't just go around making chandeliers out of crystals/beads/butterflies/pink pom poms and expect him to feel at home too. I liked the popsicle stick chandelier because it felt more unisex (or like a children's arts and crafts project, if you dislike your child enough to let them risk their lives and limbs with a glue gun).
So while in Vermont a few weeks ago, I procured the necessary supplies (yes, it was easier to shop for craft supplies in VT -- when is the Michael's in Porter Square going to open, and how quickly will I spend my entire life savings there? Trick question, I just spent my life savings on my MBA, and I haven't even started classes yet). I needed: embroidery hoops (three different sizes, but I used the ones from my failed bedroom light project for the biggest size) and popsicle sticks.
Here are my embroidery hoops. I chose 14", 10" and 6". Each hoop really comes with two rings, one inner ring and one slightly larger outer ring. For my purposes, I just popped the metal brackets off the outer rings (that's what you use to adjust the width if you're actually trying to embroider something) and used a glue gun to secure them shut.
Then I started gluing the popsicle sticks to each set of embroidery hoops, like so. As you can see, I chose multi-colored jumbo popsicle sticks because I thought the color would be fun.
About an hour and several burned fingers later, I had all three:
Then I attached them to hang together by screwing in three tiny eye hooks evenly spaced around each embroidery hoop, and using short lengths of wire to connect the hooks on the bottom of one hoop to the hooks on the top of the next one, etc. You can kind of see it in the below photo, which is looking down the medium-sized hoop to the small one below it.
I thought it might actually be my first foray into wiring a new light fixture, since I was planning to install it like a pendant light with a bulb hanging down from the ceiling and then the shade around it. I even went so far as to buy all the wiring supplies and pump myself up for turning off the electricity, removing the current fixture, stripping wires, (not) electrocuting myself, etc. But alas, when it came time to remove the existing fixture, I discovered it was being held in place by a stripped/very old screw. Rather than battle the fixture and risk damaging anything, I decided to just hang the shade around the existing fixture like so:
(with the light on)
(without the light on)
I actually really liked it, but ultimately I felt like it was a little too much for the space in terms of size and color. So I decided to slap on a coat of white paint (the color is still visible, just muted), and remove the bottom segment.
I was left with this:
(light off)
(light on)
As per the disclaimer at the beginning of the post, I really couldn't capture good photos of this space because it's fairly dark without the light on but with the light on it's hard to get a good look at the shade. This is the best I could do, but as usual I'll implore you: come see it in person, it looks better. But actually, the second-to-last photo shows the blue of the hallway more accurately than I've been able to capture it in the past, so there's the silver lining.
So that's that, my hallway light makeover!


Nice! I do like it better with the two tiers than three. And it complements the color of the hall so nicely with the layer of white over it. Another beautiful DIY project!!
ReplyDeleteThanks Mom! I'm pleased with it given the rental circumstances. And it was fun to do some arts and crafts! :)
Delete