At last, the hallway project is complete! I've been wanting to makeover this space for a little while now -- it's the first and last thing you see when entering our apartment, and even though the most important thing is for it to be functional, that doesn't mean it can't look good doing it. We actually have a pretty good amount of space considering what's typical of city apartments, and it's not like it was a disaster or anything -- just pretty blah.
Exhibit A: the view from the front door, looking down toward the kitchen
Blahhhhhhhh
Exhibit B: Standing in the kitchen, looking back down toward the front door
Meh
I've been thinking for awhile that a fresh coat of paint would make a big difference, and really make the white trim and doors pop with contrast (there are seven doors/doorways in this hall: the front door, the door to the living room, a linen closet door, the kitchen doorway, the bathroom door, a broom closet door, and a coat closet door. And yes, we are blessed with lots of storage in this space, though it's all pretty small.). But I also thought it might be a good chance to expand my DIY horizons, so I decided to add a little architectural interest to the space through some board-and-batten.
Some what-and-what? is what the bf asked when I told him my plan. Rather than trying to explain it, I'll just show you a photo:
This is board-and-batten.
Like most things I undertake, board-and-batten is all the rage in DIY land these days so there were plenty of tutorials to draw on. I didn't quite do the same thing as any of them, though, so I'll write about my full process here.
Actual board-and-batten involves mounting large boards on the wall and then using the battens (the vertical wood strips) to cover the seams where the boards meet each other. But the more inexpensive DIY version just involves mounting the battens directly on the wall flush with the existing baseboards, topping them with a long strip of moulding/MDF/chair rail, and then painting the whole thing semi-gloss white. That's what was done in the photo above.
Step 1 was measuring all the walls in the hallway to get the proper dimensions for the battens (those vertical strips) and the chair rail (the horizontal strip across the top). I waited until about 15 minutes before we were supposed to pick up the zipcar to do the measuring, but I wouldn't call that best practices. We have four segments of wall in the hallway, so I measured the length of each one. I decided I wanted the battens to be about 33 inches each, but knew I could change that by a few inches in either direction depending on what sort of selection I found at Home Depot (I've never cut my own moulding there before, so I didn't really know what to expect...). Based on the length of the wall segments, I thought I'd need 10 battens in order to space them about a foot apart.
Step 2 was having my amazing bf to drive me to Home Depot (he's the designated driver in our family because he's about 500% better at driving than I am...don't make fun of me, driving in Boston is a nightmare). Then we wandered around home Depot in awe for a little while. He meandered off to the cleaning supplies aisle, while I headed for the construction section. What a modern couple we are.
Eventually he found me in the moulding aisle muttering to myself about chair rail, casing, lattice, and trying to convert inches to feet while crouched on the floor scribbling on scrap paper. He very patiently fetched a giant cart, helped me load 15-foot lengths of moulding into it, and pushed it down to the cutting station where we cut everything down to size. I calculated that I needed a total of 14.5' of chair rail for the horizontal trim (which I cut into a 7' and 7.5' length to make things easier, planning to cut them down further at home for the four individual wall segments), and 25' of lattice strips, cut into 10 lengths of 30 inches each for the battens.
I also picked up finishing nails of the right size, a nail punch set (that's for driving nails in so they're flush with or below the level of the surface so they can be puttied and painted over), and paintable caulk.
Step 3 was installing the battens along each length of wall. I decided to space them a little differently along each wall segment so that they're evenly spaced within each segment, so they vary from about 11.5" apart on one wall to 13.5" apart on another. I used tape to hold them up to make sure I liked the spacing, like so:
Then I nailed them each to the wall, using a level to make sure they were straight.
Each one needed anywhere from 2 - 4 nails -- the wall and wood were warped in a few places, so I needed a few more nails to hold some of the pieces down flush with the wall.
After I installed the battens on all the wall segments, it was time for the chair rail. Since I bought a 7' length and a 7.5' length, I needed to cut them down to the right size for the four different walls. I apparently did some pretty awesome (/risky) math at Home Depot to figure out the best way to cut the lengths (they want to sell by the foot, not segments like 70 & 7/16 inches like I specifically needed, so I tried to group them in a way that made for more even lengths that I could then trim down at home), because when I finished cutting the right lengths I had exactly 2 inches of chair rail left. Not a lot of room for error! I cut them using a hand saw and miter box, which was a bit of a pain but not too difficult since the chair rail was pretty thin and I only needed to make 90 degree cuts.
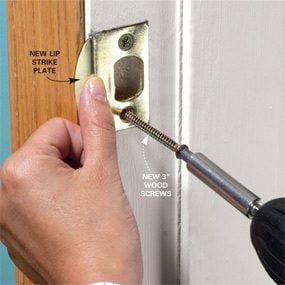
Then I mounted the chair rail above each set of battens, nailing it to the wall. I used the nail punch to sink the nails a little deeper than the surface of the chair rail. This is what using a nail punch looks like:
The little instrument has metal on the other end, and you just hammer that to drive the nail in. Obviously this photo is staged -- I'm barely coordinated enough to hold the nail punch in one hand, keep it on the head of the nail, and hit the other end of it with a hammer, let alone take a photo of myself doing it.
I'm not going to lie, installing the chair rail took a loooong time -- nailing by hand and then sinking the nails with the nail punch was just really tough (and involved a lot of scrabbling along the floor and contorting myself into weird positions to get the best leverage). But look, it's so pretty! (In a "half finished project" kind of way.)
And two of the other walls:
Step 103 (I lost count, but I'm sure this is accurate) was touching up the new trim with caulk and wood filler. This is the step that hopefully makes it look less like I just nailed a bunch of boards to my wall when all is said and done. I used the wood filler to cover the nail holes, and then caulked along every seam where trim meets wall, both the chair rail and the battens. This takes awhile, but it's seriously so important.
See, here's a picture of the chair rail pre-caulking:
And here's the same segment after I caulked:
See how there's no gap between the chair rail and wall? You might think that paint would disguise this gap, but it won't -- it will just sink into it or drip unevenly. But now when I paint over the caulk, it will like so much more seamless.
Here's another example, smoothing out where the chair rail meets an existing door frame. Pre-caulk:
And post-caulk:
See how that gap is gone? The tan smudge on the chair rail is the wood filler. Of course, the walls are all pretty dinged up and the existing baseboards have seen better days, so I'm not getting too perfectionist -- but I at least want to make the part that I'm adding look its best!
Next was finally painting! Oh wait, first was waiting an extra week because apparently the hardware store is closed on Easter and I didn't buy my paint ahead of time because I was still waffling over the color. (I was delayed a week because I basically only work on this kind of thing on weekends, so I needed to wait until the next weekend to get painting).
I knew I wanted the board-and-batten, door trim, and doors to all be a fresh semi-gloss white, and then use a robin's egg blue on the wall above the board-and-batten (in flat, not semi-gloss). But easier said than done -- robin's egg blue can really be a range of things, and the swing from something that looks more blue to something more green can really be dramatic.
For instance, is the perfect robin's egg blue this pale blue shade?
Or is it this shade, a little greener?
Wait, those are the exact same room in the exact same light. Is it me, or does the second picture look greener? Okay, maybe this seems like splitting hairs, but with all the work that goes into painting, I never want to be looking at the finished product month after month thinking "I think it's a little too blue" or "I wish I had gone lighter."
So maybe the perfect robin's egg blue is one of these?
Eventually I decided to go with Bird's Egg by Benjamin Moore (which appears in the top right of Centasional Girl's photo above). I really liked some of the greener ones, but right now our kitchen is a mint green that I'm not a big fan of and I was worried it might look too similar and actually make the hallway read more mint green (since the kitchen is visible from the hall). I might repaint the kitchen at some point, but not for awhile yet.
In any case, I painted and painted and painted and painted. It just always takes longer than you think it will/should -- two coats of the blue and two of the white, plus lots of precision painting around all those doorways and the ceiling. Basically I spent two days painting. But it was so worth it because I'm in love with it. It's everything I hoped for and more. Behold:

I've got some more pictures at the end of the post. But first, a few things to note. First, I tried a new trick with painter's tape that I'd read about but always been too impatient to do. I'm so glad I did, it was a DIY miracle. Basically, I hate taping because it takes forever and then there's all this bleed through anyway that makes the edges uneven. But I really wanted clean lines where the trim met the blue walls, and I just can't do it freehand. So I took the time to tape, and really it only added like 30 minutes at most. Then, I painted over the edge of the tape with the base color (in this case the blue wall color) like so:
That created a seal of sorts along the edge of the tape, which preventing the white from bleeding through when I painted back over the trim with the white paint. See, look how clean that edge is?
Also, it's amazing what a coat of white paint can do. The doors and trim were already white, so it would have been easy to get lazy and not repaint them. But they were so faded and yellowed from time, look how the "white" broom closet looked when I started painting over it with new white paint:
Yikes. And ew.
Okay, now here are some more photos of my beautiful new hallway. Please ignore the kitchen in the background, it's a mess.
This photo is looking toward the front door, before I hung the coat racks back up.
I hung them a little lower than they were before, and above them hung four prints by Erin McNulty (she sells prints through
her shop on Etsy, they're just so fun and cheerful and I've bought a bunch).

I like the idea of the four seasons displayed above our coat rack, where we hang all manner of seasonal paraphernalia! These prints were in black frames in my office until last week, but I brought them home because I knew I wanted them for this project. Then I just slapped some white paint on the frames.
In any case, that's the hallway makeover! I have to figure out the furniture situation now since it looks so nice with everything cleared out but we obviously have to use the space and having a table to put mail, keys, etc on is nice. But for now, I'm basking in the beauty. Oh, and the color is perrrrfect. It was hard to capture in the photos, it looks more light blue than robin's egg blue in the photos but in person it's got a bit of a turquoise thing going on. You just have to come see it for yourself I guess! I have a lot left over, so once I recover from this round of painting who knows what's going to get some robin's egg blue paint!


