So what I actually did with them isn't all that creative: I made a corkboard. Out of corks. How obvious. But I do like the fact that I'm using the cork strip to hang bibs from races Sam and I have done (we have to remember to start saving them, though, we only had a few I could find besides the marathon and half marathon ones, which I framed to celebrate my super impressive fella'). The juxtaposition of the race bibs and all the wine drinking implied by the homemade corkboard entertains me.
I already had a handful saved up to make these little name cards for when we hosted Thanksgiving:
(Of course, all these are pseudonyms to protect the anonymity of our family members, they might not be ready to be thrust into the public spotlight by this blog)
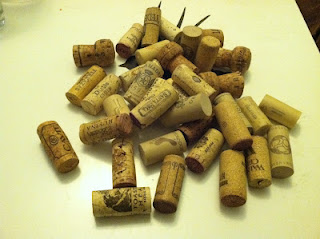
Then I just kept collecting them and stashing them in a not-currently-on-display vase in my "craft closet" until I thought I had enough:
Enough = the right length to cover two paint stirrers I had left over from the sunburst mirror project. First I laid all the corks out in a column, making sure to alternate them directionally (since they're a little wedge-shaped) and have the label facing up.
I stapled the two paint-stirrers end-on-end with my staple gun (one of my favorite tools) to join them. Then I just ran a few thin lines of wood glue down the length of the paint stirrers and transferred each cork to rest on top in the order I'd laid out. Wood glue takes a little while to dry, so I had time to make any adjustments as needed (unlike hot glue, which dries really quickly so you have to get it right the first time but then you don't have to pace around impatiently). Then I let it dry overnight, attached some mounting strips (these things) to the back of the stirrers (I could have used brackets and a nail if I had something the right size on hand, but I opened the craft closet door and the mounting strips were sitting right there...), and pressed them onto the wall next to the shadow boxes where I've framed bibs, medals, and pictures from Sam's half marathon and his marathon/my dad's and my 10K. What can I say, I'm a proud girlfriend.
Then I tacked on the few other race bibs I could find. Of course as we add more over time the whole "this is made of wine corks" thing will no longer be obvious (because they'll all be covered up), but I'll cross that bridge when we come to it. That's probably a long ways off....


Nice! You seem to be saddled with too much of your father's genetic baggage. My apologies. Something that I tried to do with all my saved corks once was to make a serving tray, like the one shown here (http://www.winevine-imports.com/blog/2009/12/wine-cork-art-projects-how-to/flange-wine-cork-board/), although I was doing mine without the benefit of anything resembling ... you know ... a PLAN. You seem to have had more success with yours than I did, so perhaps I should just ship all my corks to you!
ReplyDeletexo Dad
Fortunately my plan didn't need to consist of much more than "line corks up in single row, apply glue." I'm not sure how anything more complex might have turned out. But send your corks my way, and we'll see! :)
Deletexoxo