First, the requisite "before" picture. This is what the room looked like in July. It's painful on so many levels.
Note: I had already done the matching lamps at this point. Again, more detail on each individual project in future posts.
Then we painted! The back wall is yellow (which is what you're facing when you walk in the door), the other three are gray. And I made new curtains for this window and the one on the wall to the left of the bed (out of shower curtains, which I have concluded are awesome for fun curtains because there are so many playful patterns and colors).
You can see the gray walls in the photo below. And the gallery wall, though it's very much in-progress in this photo (ie I've changed it up a bit since then). This is the wall that's at the foot of the bed, opposite the yellow wall.
Then I was kind of complacent for awhile, until I worked myself into a frenzy over the holidays. I had four days in Boston with no work, what else was I going to do?
First I painted the brown armoire that came with our apartment (because the bedroom closet is only big enough for one person). I'd been resisting doing anything with it (besides putting on some white contact paper as door panels to lighten it up a little) since we don't own it and I didn't want to spend too much energy on it. But I couldn't handle how dark the room was anymore - we have some lovely wood dressers that are family heirlooms, I didn't need some giant laminate monstrosity overshadowing those. So I painted it white, then applied some stenciling by hand. First, a reminder of the before (yes, those are my teddy bears, Tina and Oliver):
The after is probably one of my favorites to-date. Not too shabby, if I say so myself.
I also found some great yellow and gray fabric and made a few throw pillows, plus embroidered another one.
I also decided I wanted to add some art on either side of the window behind the bed, and got the idea to try something with doilies because I thought they might lend a cool pattern. Fortunately the idea came to me while I was in VT over the holidays, and I was able to find some in the basement of Mom's and Fred's house, which is just about the best place to go shopping for home goods. Thank you to both for letting me take doilies that came from both their moms! I also hung some Christmas tree lights behind the white sheer curtains, I love the sparkle. Lastly, I sewed a pin-tucked duvet cover out of flat sheets. I wanted something white with a little texture, and thought this was an interesting approach.
The dressers used to be at the foot of the bed, but I moved them to the side wall (the newly-painted armoire and oldly-painted jewelry armoire - which I did last fall - took their place). The sunburst mirror I made last spring and had hanging in my office, but it felt like the perfect size, shape, and color for this space so I brought it home. Now I stare at a blank wall all day long at work (ok, mostly I stare at a computer screen, I promise I'm not just looking at my wall all day), but when I go to bed at night I can look to this on my left and smile.
This is the gallery wall as it currently stands. I moved the jewelry board (where I hang my earrings) along with the jewelry armoire, so it's kind of part of the gallery wall now. I'll zoom in on the individual pieces and write about their significance (and how I made the ones I did) in a future post. I definitely plan to add to it over time, which is one thing I like about this approach rather than a more rigid layout.
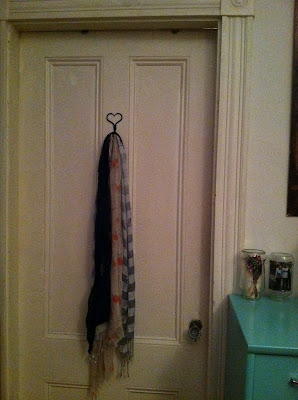
Lastly, I added a hook to the outside of the bedroom door (which you see when you're in our den/the rest of the apartment), which Anneke gave me for Christmas. I hung some of my favorite scarves from it.
Close up on the hook.
So I think that about sums it up! Of course, I can't wait to chat your ears off (or write your eyes off?) in future posts about the details of each of the many individual projects that went into it. I'm pretty happy with where things stand now, though I've already got some tinkering/additions planned (mostly to add a few splashes of color, since things are pretty yellow, gray, and white right now). My name is Sage, and apparently I'm a diy addict.


No comments:
Post a Comment