* Save-the-Dates
* Invitations
* Ceremony programs
* Signage
* Escort cards
Save-the-Dates
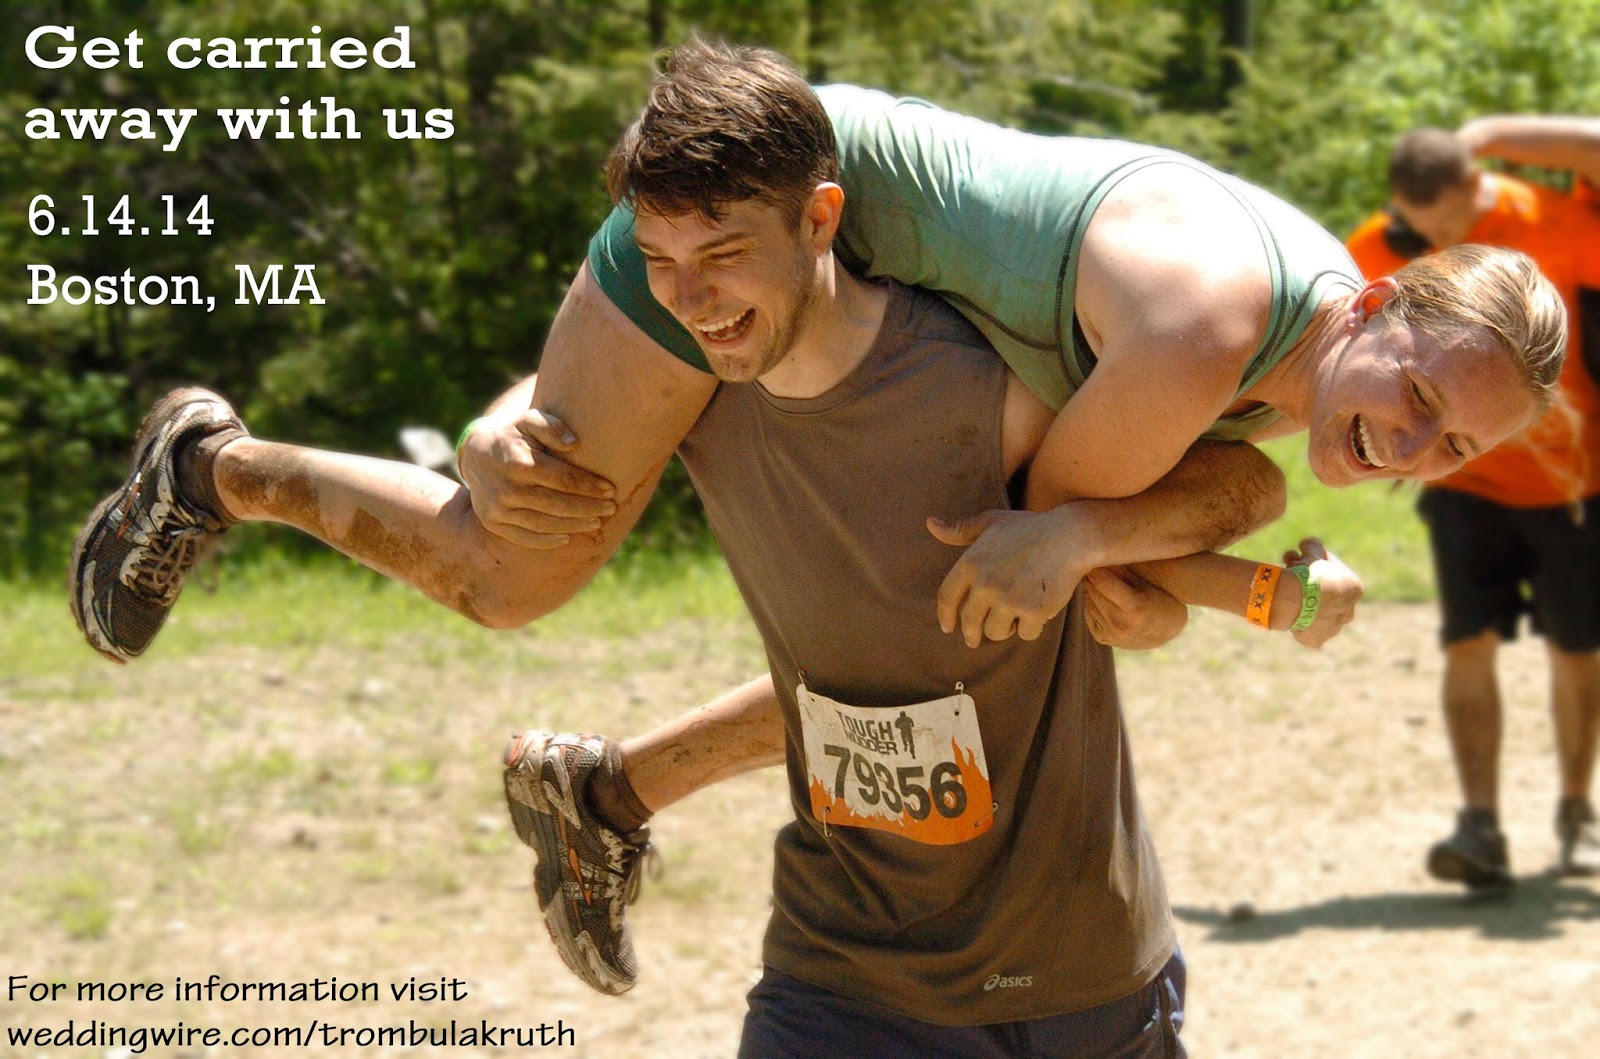
For the Save-the-Dates, we chose to design something simple in Adobe Photoshop Elements (a more basic form of Photoshop that also comes with a much lower price tag -- I use it for photo editing and it's pretty powerful). We just used one of our favorite photos of the two of us, I applied a depth of field filter that kept the two of us sharp while adding some blur to the background, and then I layered on some simple text with a moderately bad pun:
We chose to email the vast majority of them both for financial and environmental reasons, but we printed a dozen or so hard copies to mail to close family who we thought would want the keepsake as well as older relatives who might not take to the email. We printed them at CVS pharmacy as "cards," so they were on a heavier cardstock with the photo on one side and blank white on the other side. Then we popped them in envelopes to make sure they didn't get marked up in the mail like postcards sometimes do. All told, we spent about $10 total on the Save-the-Dates, just the printing and postage costs.
Invitations
The invitations I purchased at Michael's -- they come unassembled and blank except for the design (in this case, turquoise love birds -- see post on colors and theme....), and then we wrote the text, printed them on our home printer, and then assembled them. The component parts included an outer envelope (for everything), inner envelope (to return the RSVP card), insert with invite text, RSVP card, folded invitation and RSVP holder, and twine to tie around the holder.
(Note: this photo is after I'd already printed on them)

We printed on the envelopes rather than hand lettering them, but I picked a font that somewhat resembled handwriting (La Belle Aurore, available for free download here). I used an excel spreadsheet to track all our wedding planning including the guest list, so I just used mail merge to prepare the envelopes with the right names and addresses (sending just one per household).
Here's a close up on the various pieces:
RSVP card and envelope
Folder invitation and RSVP holder with RSVP card and envelope tucked inside
Final invitation with twine tied around it
I loved the invitations, but unfortunately I also found that the text got a bit smudged by the time it reached our guests in the mail (and by the time the RSVPs made it back to us). I think it's because the printer had a hard time printing on the heavier paper and cardstock, and it would have worked better if I had adjusted the settings on the fuser (these are printer things that I only barely understand). But oh well, you live and learn and there's no use getting too bent out of shape about it.
Ceremony programs
I knew I wanted us to have ceremony programs, and we also needed a printout of the words and music for the two hymns that we sang during the ceremony. For the programs, I designed something simple in Word that was front and back and printed two programs per piece of paper (landscape orientation), and then printed them on white cardstock at home and cut them to size with a paper cutter at Kinkos. Then I used the custom stamp that I mentioned in the previous post to stamp the top of the programs -- half in turquoise ink, half in coral.
Front:
Back:
For the hymns, I just did a simple layout to print front and back on plain white paper so that when folded in half each one was a 4-sided booklet.
I got a simple basket at Michael's, painted a turquoise stripe around the bottom, and then weighed down the programs and hymn booklets using rocks I'd swiped from the banks of a river near Sam's childhood home in Pennsylvania when I was there in May.
Signage
For the various signs throughout the reception, I just designed them in Word using free fonts that I liked and then printed them out and popped them in frames I already had on hand. For instance:
Escort cards
I already wrote about making the escort cards in my post about guest favors, which you can see here.
We didn't do individual menus for each seat, as we decided to have the salads pre-plated when people came in from cocktail hour (so there wouldn't have been a good place to put the menus). So that's about all the printed materials we had, nothing too exciting but we saved a fair chunk of change doing it ourselves -- about $150 all told for everything mentioned above, including mailing the invitations. Not too bad given how much custom invitations, escort cards, and programs can cost!


No comments:
Post a Comment