I decided that my generic black iphone case wasn't cutting it, given how much I've loved experimenting with color in our apartment -- why not find a way for the technology I tote around to bring the same smile to my face as all the projects that I love to gaze at when I'm home? First I did some googling to look for colorful and fun phone cases, but then I had a flash of genius about how I could integrate a few of my passions: 1) making things myself, 2) inexpensive things, 3) painting, and 4) the color turquoise, obviously. What is this genius idea, you might ask? A paint chip case, of course.
This project was fairly straightforward:
Step 1: Order clear iphone case on Amazon. I went with this very basic one.
Step 2: Collect a few paint chips from the hardware store. Fortunately it involved taking way fewer than for the art project I did in 2011, so I was significantly less sketchy about it.
Step 3: Assemble my supplies. In addition to the clear phone case and the paint chip I settled on, I needed scissors, an x-acto knife, and a pencil. Not the most challenging of projects.
Step 4: Trace the iPhone onto the paint chip, cut it out, then cut out a small hole for the camera using the x-acto knife.
Step 5: Assemble and admire.
I'm pleased! A fast and inexpensive project that I will actually enjoy on a daily basis as I wander around school and wish I were at home making pretty things.
Saturday, March 30, 2013
Sunday, March 24, 2013
Exterior Design in the Big Easy
This past week I traveled to New Orleans with some college friends -- I'd never been before, and we decided to take advantage of Spring Break (weird to have one of those again...) and get out of the northeast. It's always a little bittersweet for me to travel when I have time off because even though I love seeing new places, it also means foregoing any work on apartment projects which is something I really love to do when I get a free moment. Fortunately, NOLA was full of some amazing and inspiring architectural sights. Just thought I'd share!
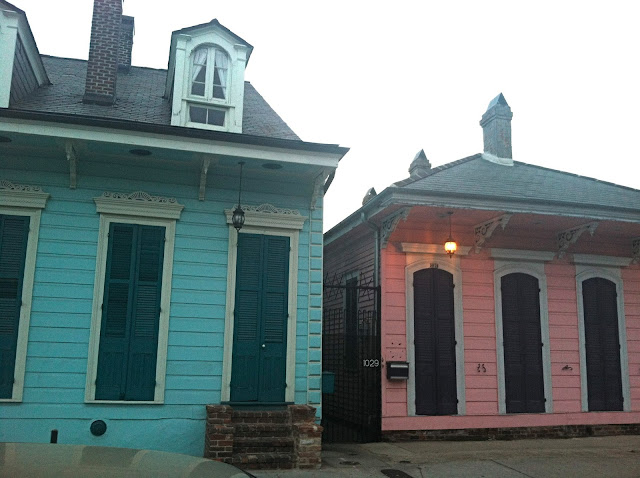
We stayed in a B&B on the border of the French Quarter and Marigny, where many of the houses look like the one below -- multi-story, with iron-wrought second-story decks perfect for catching a cool breeze on a hot summer evening.
Outside of the French Quarter we saw some larger homes as well, with classic southern architecture. Yes please, I will live in this home.
Okay fine, maybe I need to set my sights on something more modest. I'll take an adorable bungalow if I must.
Or his and hers houses. Except I want both.
There were so many amazing exterior paint colors, I found it inspirational to think that I could paint my house turquoise someday and it might actually look good.
Or maybe just the shutters if I'm feeling a little risk-averse.
There was so much blue and pink, it's like New Orleans was made for me.
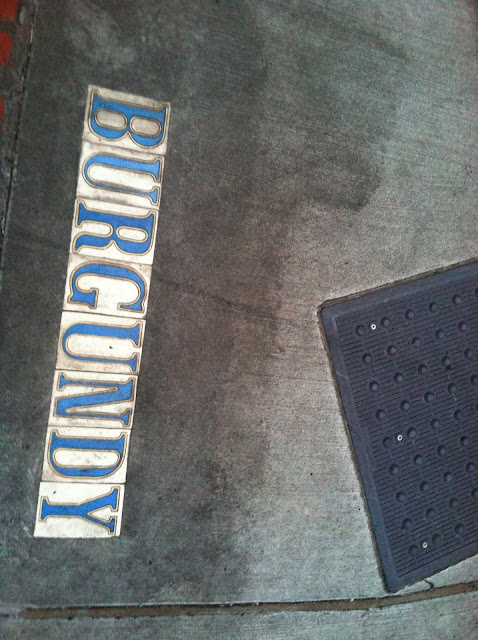
One really cool thing is that in many areas, the street names are tiled into the sidewalks at every intersection. At first I was like, "Man, this is just like Boston -- no street signs!" But then my more-observant travelling companions pointed out that the street names were actually laid right out at our feet for us. So thoughtful.
Last but not least, it was nice to spend some time out of the northeast, where the pace of life just feels different. Granted I'm a true northerner with a penchant for punctuality and efficiency, so the more laid-back style we encountered definitely challenges me. But I think I could get used to it and it could be very good for me...
After New Orleans, I headed up to North Carolina to meet up with Sam...more details to follow in a separate post. And now I'm back to the homework grind in Boston, though not without a little time to wrap up my bar project. I'll keep you posted!
Tuesday, March 5, 2013
It's 5 o'clock somewhere...
Even though I've been MIA on the blog-front, I've been doing some behind-the-scenes work on a couple of projects. This weekend I finally made enough progress on one of them to share some photos. For awhile I've been wanting to do something with the corner bookshelf in our study, which our landlord seems to have built himself and attached to the wall. It's not the prettiest of things, but it seems to be there to stay so we'll just make the best of it. We've been using it to help corral our books and a number of other things, but it was looking downright cluttered and I decided I wanted to streamline things a little and create a bar space. Yes, a space devoted to (responsible) drinking.
Here's what we started with:
I cleaned everything off, and started by applying a fresh coat of paint to the bookshelf. I wanted to keep the cost of the project down, so I used some light gray paint that I already had on hand from the armoire stenciling project. When I first started painting I was worried that the color might be too light and not contrast enough with the once-white-now-somewhat-gray walls, but I reassured myself that paint always dries darker. And also the light in the room was really low since I was painting at night, but I knew it would look better in daylight. In addition to painting the bookshelf, I painted the "back" of the bookshelf, which is technically just the wall since it's open-backed. My plan was to keep things relatively muted and subtle, with a light gray structure and then the back a stenciled white pattern on top of the gray.
I used a Martha Stewart stencil that I bought at Michael's -- about $8 with a 50% off coupon. The stencil took awhile to apply because of all the irregular spacing and tight corners. I had to find some creative ways to bend it, tape it off, and even free-hand paint at times to keep the pattern consistent in all the right places. Basically I taped it loosely in place, painted over it, then removed it and repositioned it. I alternated between shelves to give the paint some time to dry in each section before returning to it. Stenciling requires going very light on the paint so that it doesn't pool in the corners or smear. In this case, I went for a bit of a rough look rather than having everything perfectly crisp, since the circumstances didn't lend themselves to perfection....
Here's the stenciling in action. The blue is the color of the stencil, but then I painted over it with white paint which is why the plastic now appears white. As you can see, I've already painted over about half of the stencil, which is the part that's completely white. The part that's still gray is where I have yet to stencil.
And voila, the the finished result!
I have some other plans for the space including some new artwork I'm working on, so things are still looking a bit bare. But I'm quite pleased with the bookshelf makeover!
Subscribe to:
Posts (Atom)

.JPG)
.JPG)
.JPG)


.JPG)
.JPG)
.JPG)
.JPG)
.JPG)
.JPG)