Thursday, July 31, 2014

Wedding DIY: Guest Favors and Escort Cards

For our guest favors, I did a lot of research into various ideas that seemed to represent us as a couple, or our wedding. We were originally thinking of doing a lobster bake, so we could have given lobster crackers (those metal things you use to crack open lobsters) or custom lobster bibs (so classy). I also thought about a bottle of some spices or something since we like spicy food. But ultimately everything gets pretty pricey when you contemplate doing it for 120 people. Sorry guests, but we thought it was better to spend that money on things that would make it a better party (like good food) than gifts you might not even really want....

So instead I decided to make magnets. Magnets are boring, yes. But most people have magnets on their fridges, so I thought at the very least they could hang around in everyone's kitchen as a little reminder of our special day. And I thought I could use them to display the escort cards (the little cards that tell everyone where they're sitting), thus killing two birds with one stone. I found a tutorial for making magnets out of glass stones, gathered my supplies, and set to work.

Here's how it went down (and I will confess, I made these in November for our June wedding...I just wanted to start getting tasks out of the way):

For supplies, I needed colored craft paper (I used 6 sheets of paper: 3 shades of turquoise, and 3 shades of pink/coral), strong clear glue, decorative glass stones (the kind that are rounded on one side and flat on the other), and strong magnets. I found all of this at Michaels. I also used the rubber stamp that I bought on Etsy and used for a lot of our wedding decor.

The basic process was to first stamp each sheet of paper a bunch of times:


Then I used one of the stones as a guide, traced its shape around each stamp, and cut out each resulting oval:


Next I used the glue to adhere a glass stone to each paper oval:


(If you look closely, you can see the camera and my Harvard sweatshirt reflected in the glass...don't look closely)


I was able to squeeze out any air bubbles in the glue just by pressing the stone down firmly. The glue dried pretty quickly -- within a few minutes. Since each stone was slightly different in shape, I tried to pick one for tracing that was fairly representative and then once they were all glued together I trimmed off any excess paper that stuck out from under the edges of any given stone.

I completed all these steps for each one so I was left with a pile of stones with paper ovals glued to the bottom. Then I flipped all the stones over, dabbed glue on the back of a bunch of them, and quickly pressed down a single magnet on each one before the glue dried. I put glue on about 10 at a time before adding the magnets.


I let them dry upside down for about 15 minutes. As the glue was first drying, sometimes the magnets would slide off to one side (visible on a few stones in the photo above) -- I just made sure to keep an eye on them and push them back into place until the glue firmed up.

Then I popped all 120 of them in a tupperware container to await the wedding 8 months later. All told (not counting the stamp, since I used that for other things), they cost 33 cents apiece...not too bad!


To display them with the escort cards, I found magnetic boards at Michaels, which I painted turquoise with paint I already had on hand from past projects. I calculated that based on the size and number of escort cards, I needed two boards of the size they had at Michael's.

(sorry for the poor photo, this is the week before the wedding and I was moving fast)

I bought white wire contraptions on Amazon meant to display decorative plates or books etc, which I used to prop up the frames (you can see one at the bottom of the frame in the photo above).

For the escort cards, I mail merged each person's name and table number into a Word document using a label template in Word that put the names into three columns and 7 rows. I right-aligned the text so that the magnet could sit on the left edge of each card and not block the name. Before doing the merge, I sorted the excel spreadsheet I was using by meal preference so that everyone who wanted each meal type was grouped near each other in the mail merge. This is because I wanted to color code the escort cards according to meal selection, since people often don't remember and the caterer said this really helps. I bought three colors of washi tape at Staples (which is just thin decorative tape) -- pink for salmon, orange for beef, and yellow for polenta.

Then I printed the escort cards on white cardstock, and ran a strip of washi tape down the left side of each card (the point of grouping the names by meal preference was so that I could run the same color washi tape down entire sheets of cardstock). Then I used the paper cutter at Kinkos (for free) to cut each piece of cardstock into the individual escort cards. I'd thought about using pre-perforated business cards, but it was cheaper to just use the same cardstock that I was already buying for the ceremony programs.

Lastly, I mounted the escort cards alphabetically on the magnetic boards using the guest favors. I just alternated pink and turquoise. Here's how they looked at home:

And at the wedding:


And here's a close up:

I liked that the washi tape was definitely visible and gave the escort cards some interest once they were removed from the board, but not too overpowering when sitting under the magnet so the final result didn't look too jumbled.

We ended up having extra magnets because I made excess back in November not knowing for sure what our final headcount would be (and not wanting to have to rush to make a few more right before the wedding). As you can see two photos above, I put the extras in a basket (which my aunt made and gave to us as a wedding present a few days before the wedding -- the colors were too perfect not to immediately use it) with a little note telling people to feel free to swap for whatever color they wanted or to take extras.

Monday, July 28, 2014

Wedding DIY: Wedding colors and "theme"

As all the blogs will tell you, no wedding is complete without special wedding colors and even a theme. Picking colors was very easy, I immediately declared that they would be coral and turquoise because a) I love these colors, and b) following from reason a, almost everything in our apartment is one of these two colors so it would make it very easy to steal decorations from our home and pass them off as wedding decor (and to use leftover paint from past projects on new wedding-related projects). However, I mostly treated these as our base colors and then used lots of other colors in the wedding that I thought complemented them. So for instance, I thought coral or turquoise bridesmaids dresses might be a little intense, so instead I just asked the ladies to wear blue dresses in any style and hue of their choosing and then gave them statement coral necklaces to wear.

(Note the turquoise ribbon wrapping the bouquets)


Our moms got in on the blue theme too:


Similarly, we used yellow flowers for the bridesmaid bouquets (sunflowers) and some of the table arrangements (novelty mums) because yellow seemed to go well with turquoise and coral.


That being said, we also had plenty of coral and turquoise scattered throughout:

The flower vases (which were pasta sauce jars I'd saved for months) had turquoise ribbons tied around them:


My shoes:

My earrings:

My bouquet:

 Our seating sign and basket for programs (both DIY):

The programs themselves (also DIY):

The escort cards and guest favors (more DIY):

The tags for the wish tree (which we had instead of a guest book -- more details to come in future posts):


Picking a theme was harder. I brainstormed with friends and family and had many wonderful contenders such as "Drowning in Love" (this would be a nautical theme in which we tried to suffocate guests with our over-the-top declarations of love and dogged adherence to nautical decor) and "White Whale" (this would pit me, in my white dress, as the Moby Dick to Sam's Captain Ahab). (To those who don't get my sense of humor, these options were actually discussed but only sardonically considered.)

Ultimately, I decided to go with a simpler theme: love birds. This arose because I was picking a template for our wedding website (we used wedding wire), and the turquoise scheme that I liked the most happened to have some birds kissing on it. And then I found turquoise invitations at Michael's that also happened to have love birds on them. I asked Sam how he felt about "birds kissing," he expressed appropriate confusion about how to respond to this question, and our theme was born.

Basically I just used the "theme" to try to make everything look somewhat intentionally cohesive, even though it actually started as total coincidence. To avoid paying exorbitant fees to have other wedding-related materials designed to match the love birds theme, instead I found a vendor on Etsy to make us a $25 rubber stamp that I then used to my heart's content on things like our ceremony programs and guest favors. (I bought black, turquoise, and coral ink pads to use in different contexts.)

Thus we ended up with this smorgasbord of birds scattered throughout our wedding materials:

Wedding website:

Invitations:

Ceremony programs:

Guest Favors:

Receptacle for cards (it's a bid cage, though its hard to tell from the photo):


And there you have it: turquoise, coral, a bunch of other colors, birds kissing. It's all so romantic.

Next up will be a deeper exploration of our DIYed printed materials (Save-the-Dates, invitations, programs, and signs), and then more about the DIY decor throughout. I know you're on the edge of your seats.

Wednesday, July 23, 2014

House floor plan and thoughts for the future

I received a message from a friend that he was very happy to hear about the house and see the pictures, but was disappointed because he was expecting a full 3D rendering of the house in Sketch-Up like I did for the apartment. I don't like letting people down, so here is my attempt to remedy that situation.

Sketch-up is amazing and extremely powerful, but it's also very time consuming and challenging because of how many features it has. I thought I'd give another software a try: floorplanner. Floorplanner is specifically designed for fairly quickly laying out houses -- you can't customize and add as much detail as in Sketch-Up, but it gets the job done in a basic way. In less than an hour, I was able to throw together a floor plan.

Here's the first floor:

And the second floor:
(The second floor is the same width as the first floor, I've just shown it a little bigger here so you can read the labels more clearly)

I didn't make a floor plan for the basement. It has the same dimensions as the first floor minus the sunroom (which was a recent addition), and is one big open space.

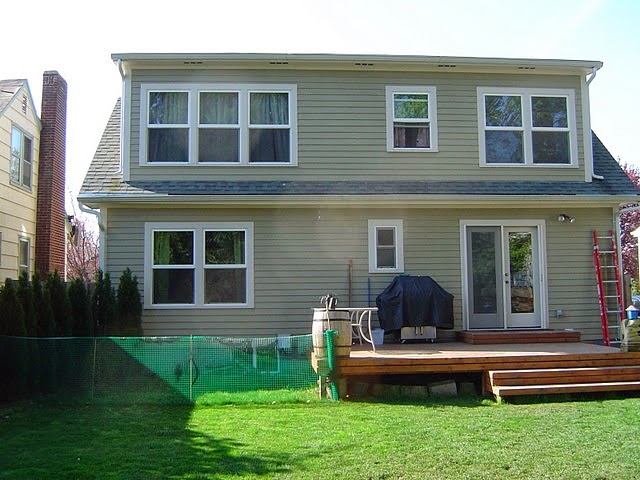
In the future we're thinking we want to open up the wall between the kitchen and the living room to create a more open concept (which would be great for our use, and valuable when we eventually sell since open floor plans are much more popular these days), as well as adding a dormer or double dormer to the second floor to accommodate a second bathroom and maybe create a master suite. In case you're not familiar with dormering (I wasn't), it's a way of building out a sloped roof to create a lot more usable space, like so (this is just a random house I found online to demonstrate dormering):

Before:


With dormer:

It's an expensive undertaking, but something we can save up for and would really boost the value of the home since only having 1 bathroom is definitely a big drawback.

Anyway, that's how the house all fits together and the bigger changes we're thinking for the layout down the road!

Saturday, July 19, 2014

Wedding: DIY clutch and wedding party gifts

We're still (im)patiently waiting for the wedding photos to come back -- we should have them soon, but 4-8 weeks isn't atypical during peak wedding season. In the meantime, I can't share much in the way of wedding DIY since I need photos of the DIY in action on wedding day. There are a few projects that I managed to get photos of, though, since they didn't make much of an appearance at the wedding: the clutch I sewed to hold wedding-day essentials, and the boxes/bags I made to package the gifts we gave our wedding party.


Pleated Clutch

I wanted to have somewhere to put emergency items on wedding day (like aspirin, fashion tape, extra bobby pins, tide pen, my cell phone, sewing kit and scissors, lipstick, etc), but I didn't have any purses that I thought were right for the job. So I decided to sew a clutch in our wedding colors, coral and turquoise. I found a pattern for a pleated clutch on Etsy that I really liked, and bought the kit that came with the pattern, zipper, interfacing, and stabilizer (which makes the clutch firmer than it would be if it were just fabric). The fabric I bought from a place downtown -- I found some coral fabric for the outside, and some turquoise silk for the lining.

This was definitely one of those "if I had known had hard it would be, I'm not sure I would have worked up the energy to do it" projects -- but fortunately, I plunged ahead unaware. It took me a few hours one day and a few more the next (the weekend before the wedding), and was definitely a lot of cutting, ironing, and precision sewing. But the directions that came with the pattern were very helpful, and I'm pretty happy with how it turned out:

Front:

Back:

Inside:

It was the perfect size for holding my various emergency items, and I just left it beforehand on the chair that I knew would be mine during the reception.


Boxes/bags for wedding party gifts

As I mentioned in my first wedding post, we gave small gifts to our bridesmaids and groomsmen to thank them for being such an important part of our celebration, and to wear on the Big Day (but we hoped they would like them enough to wear them again in the future). For the bridesmaids I got statement necklaces in coral/peach tones from Urban Peach Boutique (each necklace was different), and for the groomsmen (and Sam) we got turquoise and gray ties from Express. We liked that the ties have turquoise in them, but it's pretty understated so they seem appropriate to wear for future occasions.


We wanted to give the gifts at our rehearsal dinner, and to wrap them I made simple boxes for the necklaces and bags for the ties out of scrapbook paper. I had gotten a big book of scrapbook paper to use for various wedding-related decor -- it was something like $12 with a coupon at Michael's, and came in handy for so many projects.

To make the boxes, I used this approach. I made 5 "bottoms" in different sizes, and then to make the lids for each one, I just made another box slightly larger to match each bottom. Then I used small cards that I already had on hand with turquoise envelopes to write thank you notes (the convenient thing about picking your favorite colors as your wedding colors is that you're likely to have color-coordinated things on hand already).


For the ties, I needed something a little bigger, so I looked around for tutorials on how to make gift bags out of scrap paper. I ended up using this approach, with a few of my own tweaks to make the bags the dimensions I wanted. I used red ribbon to make the handles.


And there you have it, some easy boxes and bags with the scrap paper I already had to jazz up the wedding party gifts.

Thursday, July 17, 2014

Beacon St. Manor is Moving!

We're still in disbelief, but it looks like we'll be moving out of Beacon St. Manor and into our very own home at the end of August. We saw the house on Sunday, made an offer that evening, it was accepted within 5 hours. We did the inspection today, and after buttoning up a few more things we should have everything in order to close on August 26th. We're so excited!!!! The house is wonderful, but there are plenty of projects to keep me busy and keep the blog going so I hope you're looking forward to a renewed stream of blog posts!

In the meantime, here are some photos of the house. Some are from the listing, some I took during the inspection. I don't think the listing photos are as flattering as they could be, but that worked out in our favor I guess! Don't worry, I also plan on mocking something up in Sketchup like I did for the apartment, so you can get a much better sense for the layout. :)


The view from the street. (The driveway is actually on the street next to this, so you enter around the back.)


Then here's the driveway and yard, which is technically the back yard but since you enter from the back it’s more like a front yard.


The sunroom, which is where the back door enters the house

(There's a big closet in the sunroom, which is great for coats, boots, etc)


Then comes the kitchen. It gets a lot more light than these photos make it seem.


I'm dying to paint the cabinets white, I think the blue counters will actually look pretty cool at that point.


Then the living room. Why are the door frames shaped like that? I do not know. 
(Through the door opening, you can see where the front door enters -- but we probably won't use that as an active entrance.)


Next to the living room is the "front hall" (if you were using the front door), with the stairs to the second floor. Also off of the front hall is the fourth bedroom (which is being used as an office), the master bedroom, and the bathroom. There's only one bathroom, so that probably turned off a lot of buyers. Fine for us! We may dormer out the second floor eventually and add a second bath, but for now it's not a problem that there's only one and it's on the first floor because the master bedroom is also on the first floor.

Here's the front hall and stairs to the second floor
(The wood structure at the end of the hall is a big linen closet)


("Paint me, paint me!" the wood paneling is screaming)

Here's the fourth bedroom/office

And the master bedroom


Bathroom


Then upstairs are two more bedrooms. Both have a bit of a paint emergency going on. But I already have a plan, don't worry. We'll probably have both set up to serve as guest rooms, but with one of them doubling as my craft room. You guys, I get a craft room. I cannot begin to explain how excited I am.


There are a few big closets up here too, and lots of storage throughout the house.

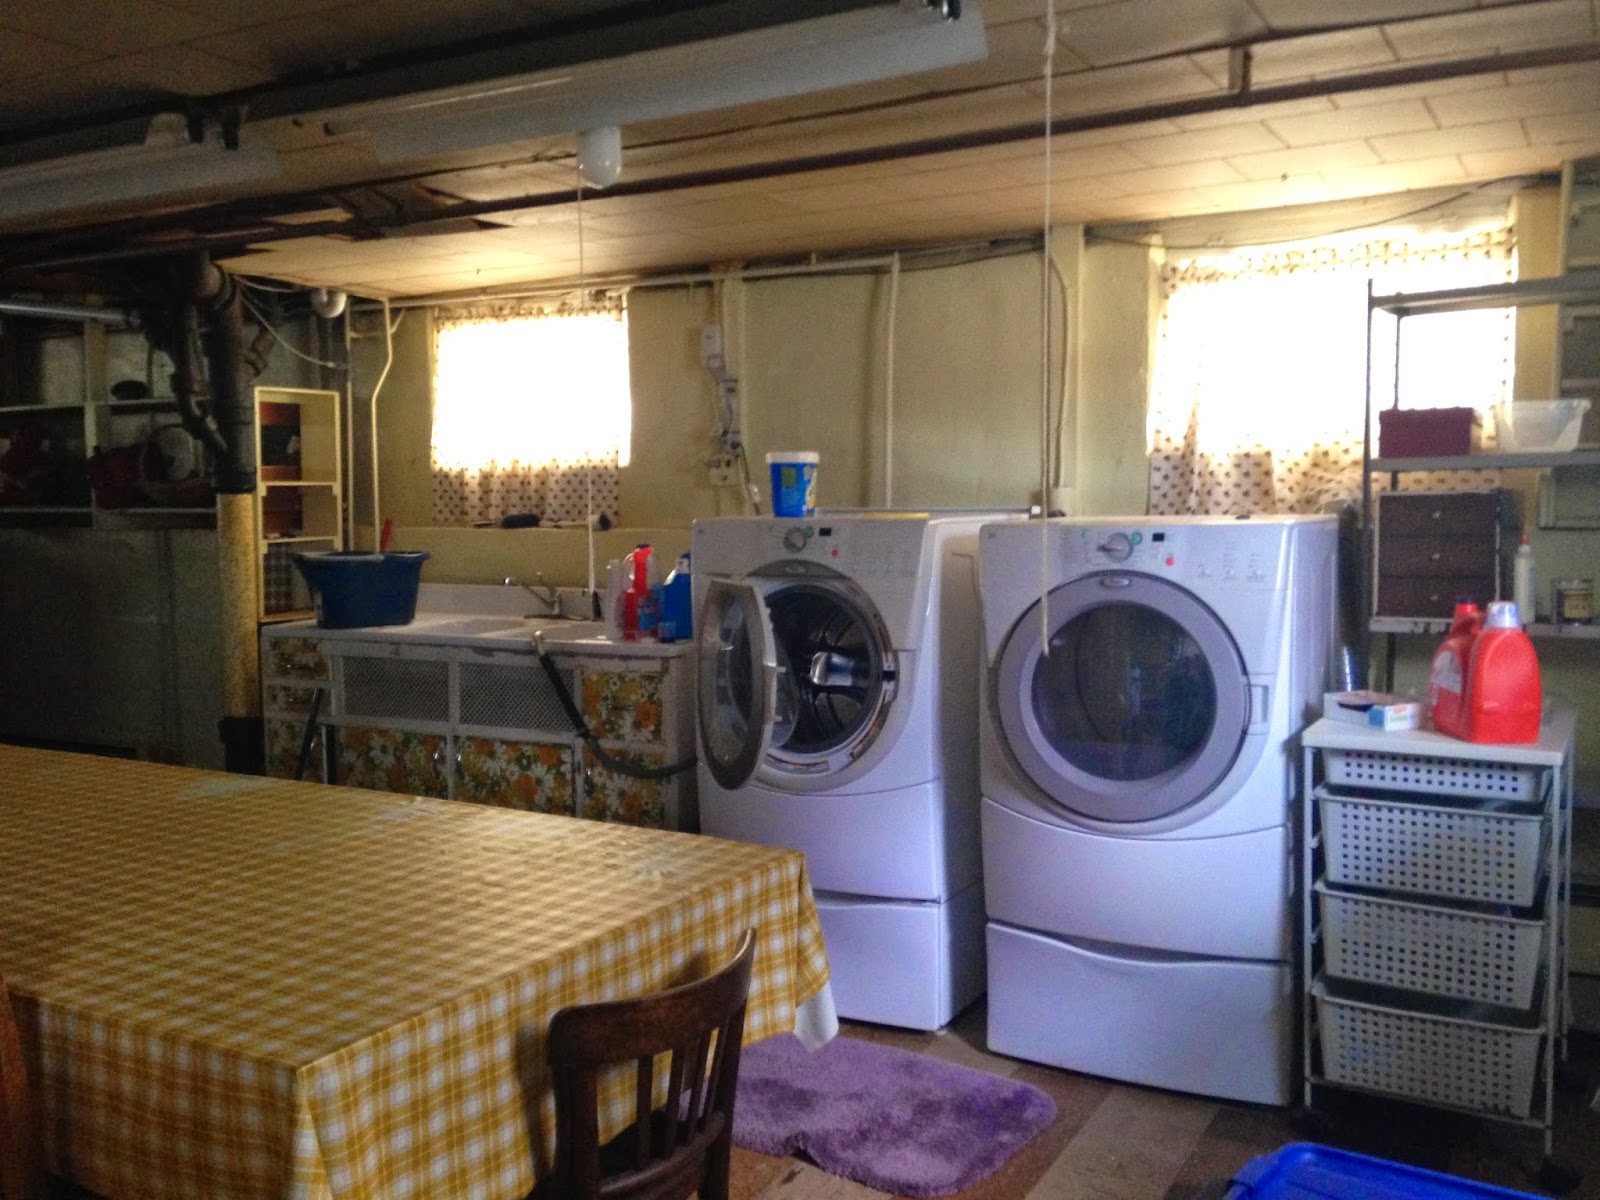
Speaking of storage, the major bonus: a partially-finished basement that houses the washer and dryer, with enough room for a home gym, workshop, and whatever else we fancy putting down there. It's time to start acquiring some more power tools. Bring on the table saw.


A whole closet for holiday decorations?!?!? And there are a few more large closets in the basement too.


Okay, so that's the tour for now. It's always possible that the deal will fall apart, but we're very optimistic. The inspection revealed some issues and we're going to get a second opinion on one thing, but it doesn't seem to be anything major that would be a deal breaker. Just some things we'll want to be sure we do (and save up for) within the first year of living there. Being a homeowner sounds kind of terrifying, a few times the inspector was like "your husband will probably know how to do that," and I almost burst out laughing. But it should be a fun adventure, and I'll document all the excitement and terror here on the ol' blog.